Integrating a .NET Core API with Github Actions
 Github Actions is a new tool from Github designed to automate workflows for github projects. There are numerous things that can be automated (here’s a list of possible actions).
Today I’m going to walk you through the process of creating a CI Action for a .NET Core API.
Currently in Beta
At the time of writing github actions is currently in beta. You’ll have to signup for it at this link. I think it took between 2-4 weeks for my invite to come once I had signed up (it’s been awhile so I’m guessing from memory). The release date has been announced at November 13th, so hopefully you won’t have to wait too long.
Creating an Action
Once you’ve received an invite, an Actions tab should display in your github repos.
Navigating to that tab you should see something similar to the following: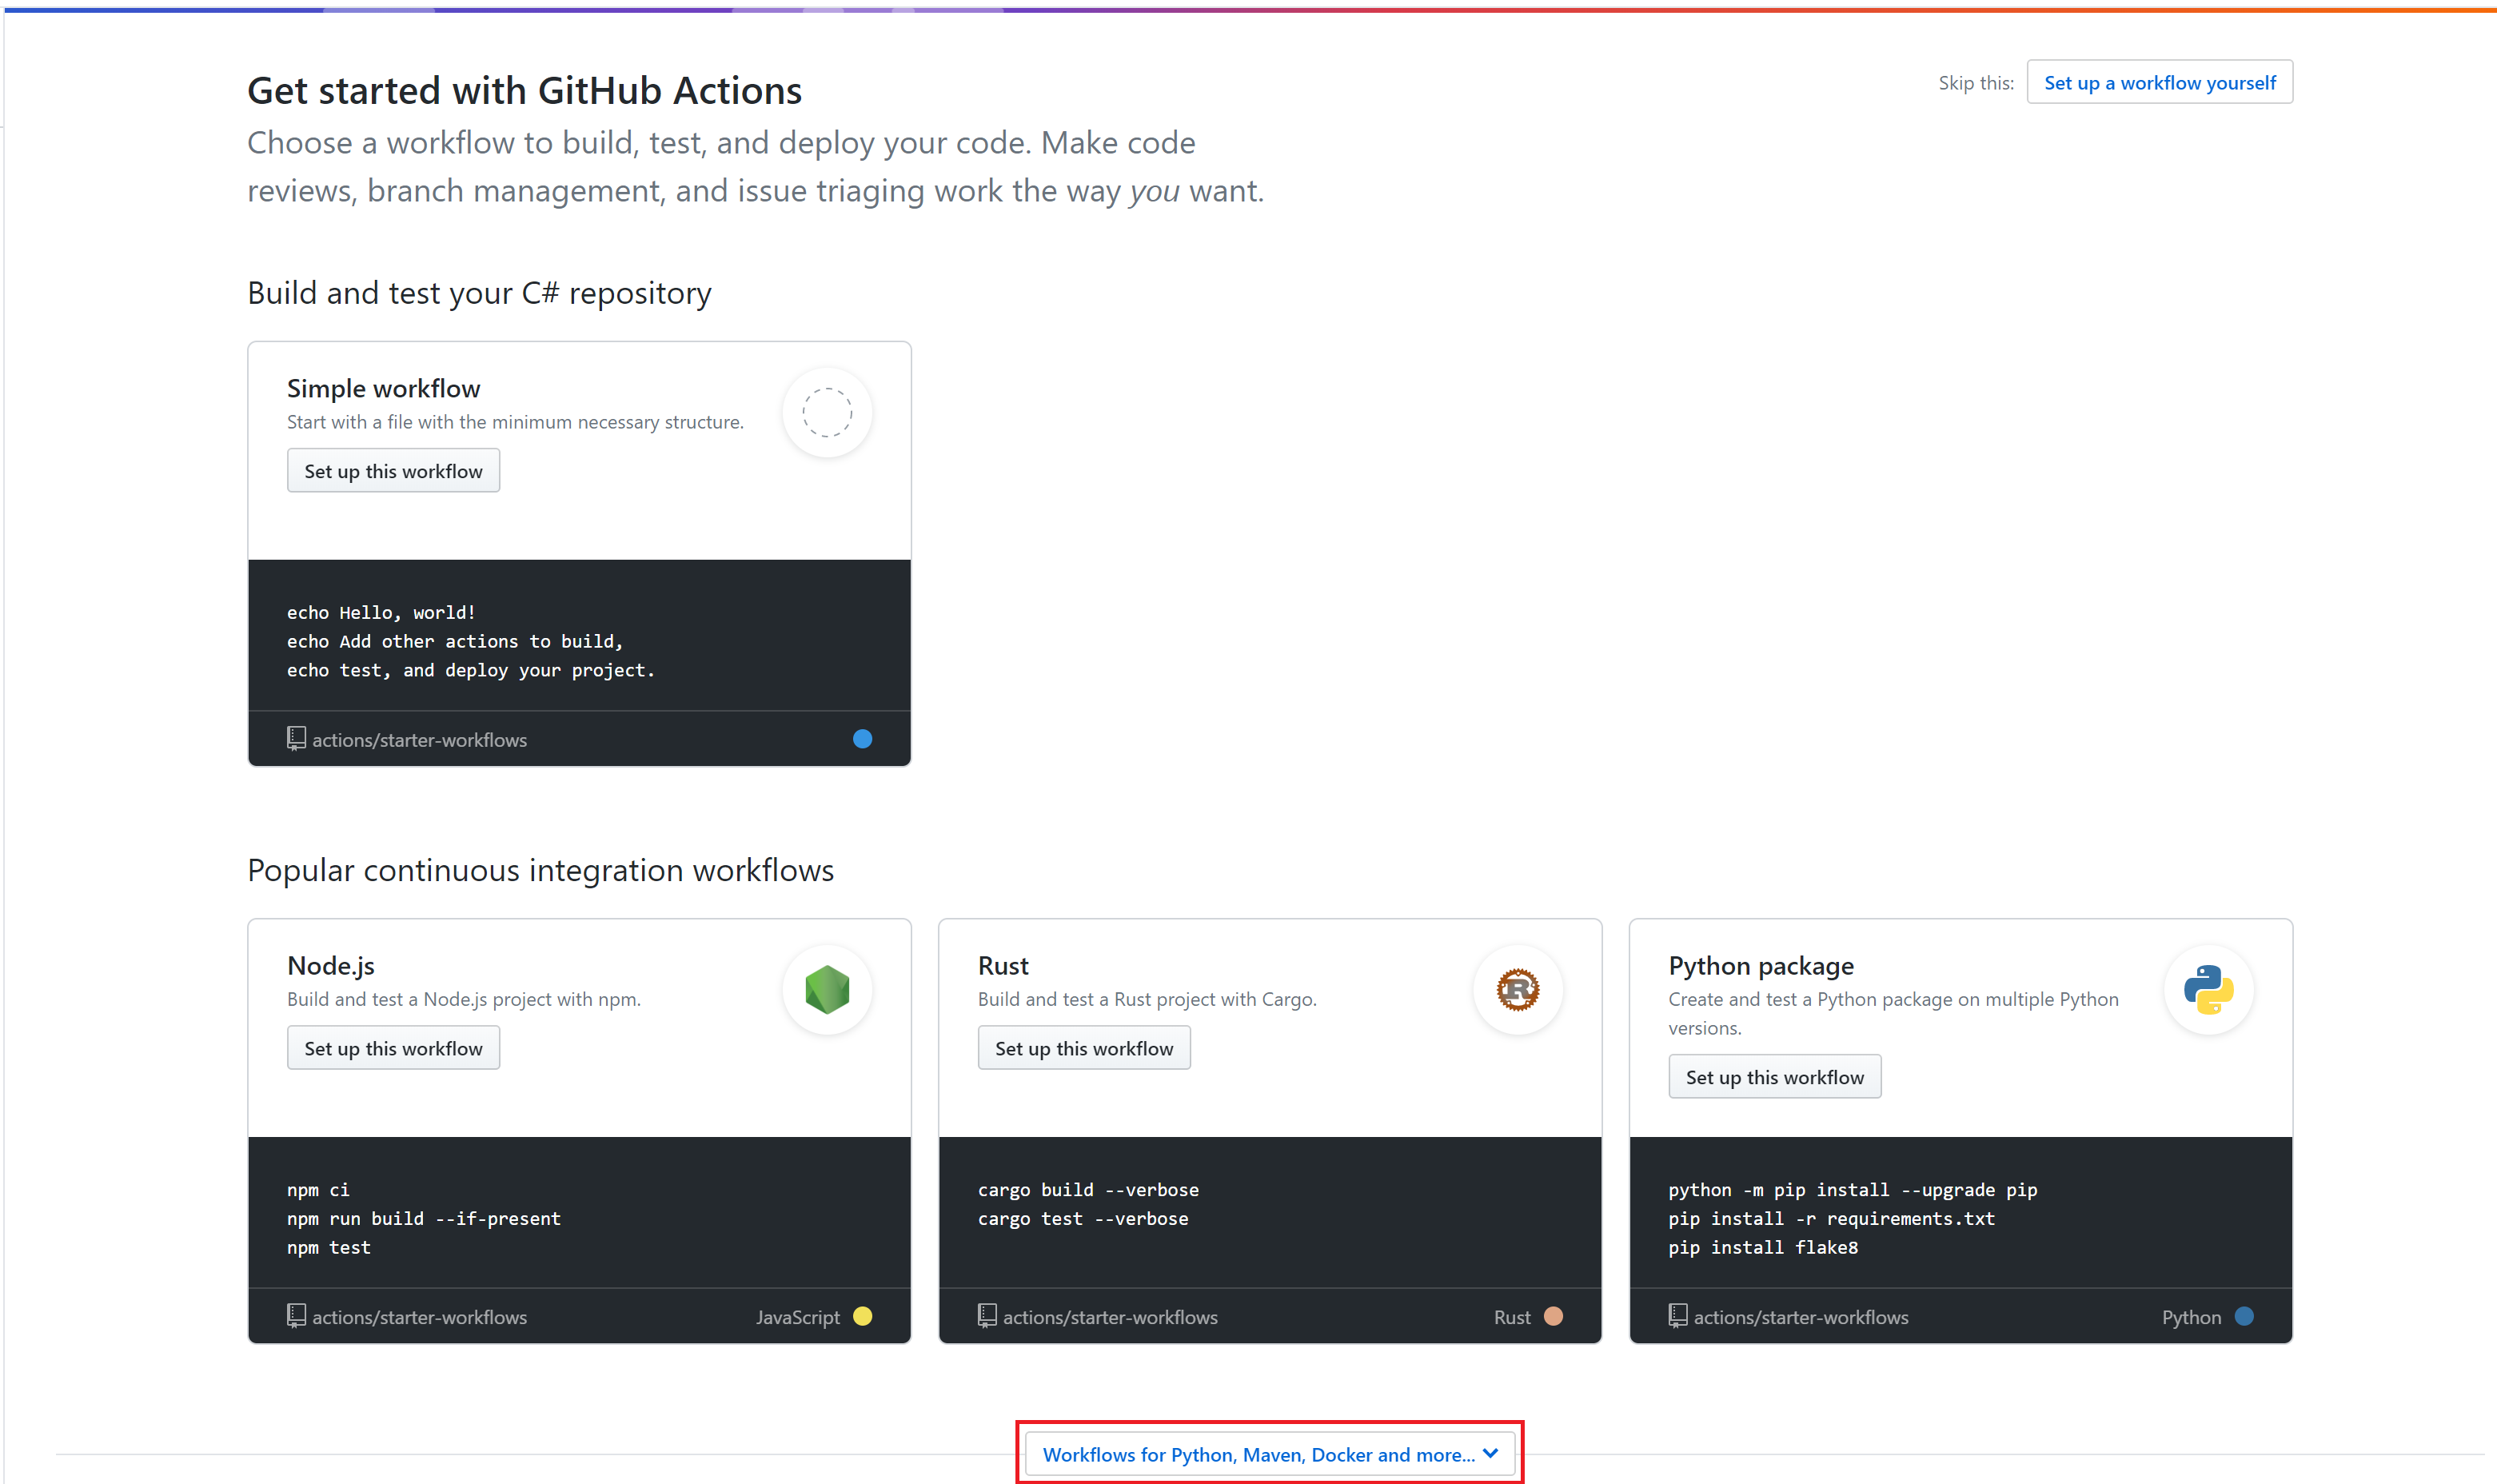
At the very bottom, click the link to view more workflows, after scrolling down a bit you’ll see one for ASP.NET Core, click the “Setup this workflow” button and you’ll be taken to the action editor.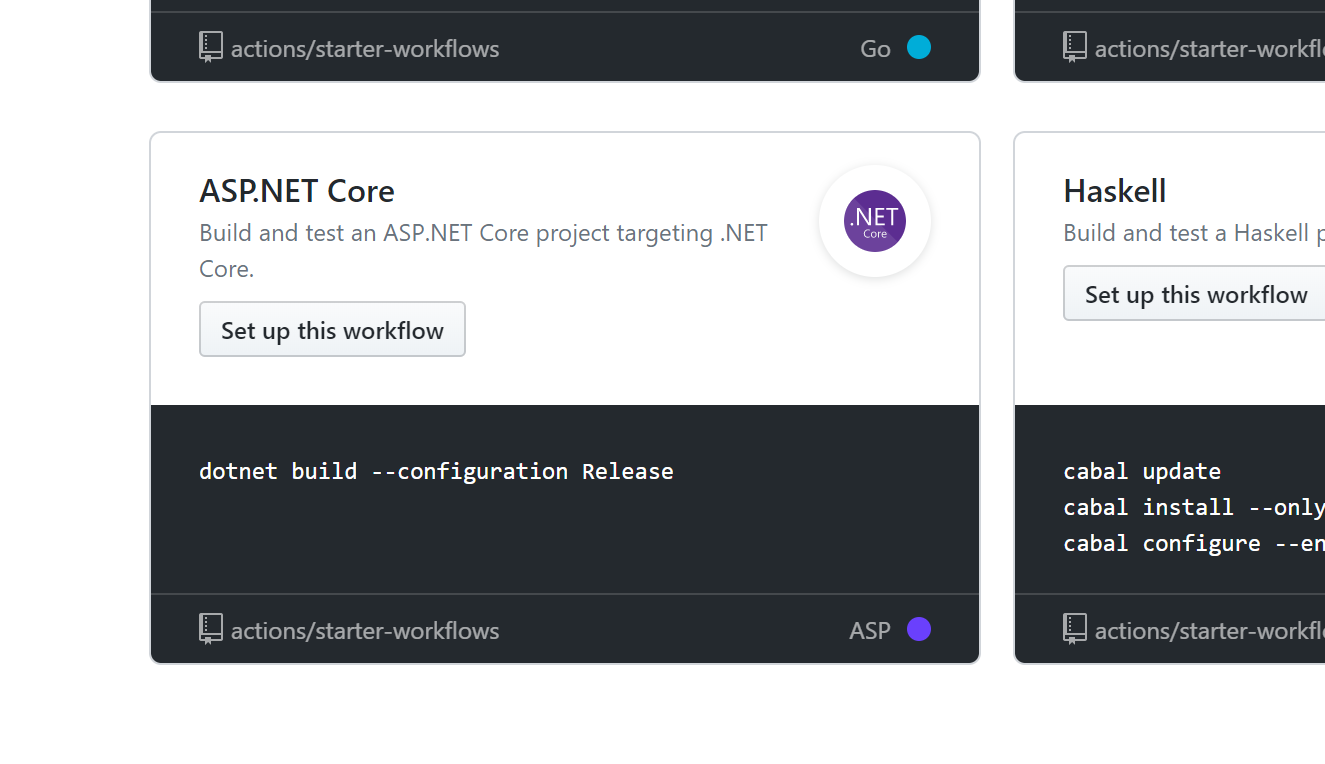
Once on the action editor you should see a default action similar to the following displayed.
This action builds the dotnet project every time someone pushes a commit. Notice that this runs on ubuntu, using dotnet Core 2.2.108 with the cli command dotnet build --configuration Release
The panel of the right of the editor is helpful in explaining the different options that are configurable for an action.
My Action
After playing around with the different values this is my current working action.
- This action runs on every push or PR open against both the master and dev branches.
- It’s a matrix build, which means it will run the same build across Windows, MacOS and Ubuntu. Ensuring the my app is cross platform.
- It builds the project and then runs the tests.
- Actions start from the root of the repo, so I’ve used the
working-directoryoption to point to where my dotnet project is located.
Price
At the time of writing, here is the the price breakdown.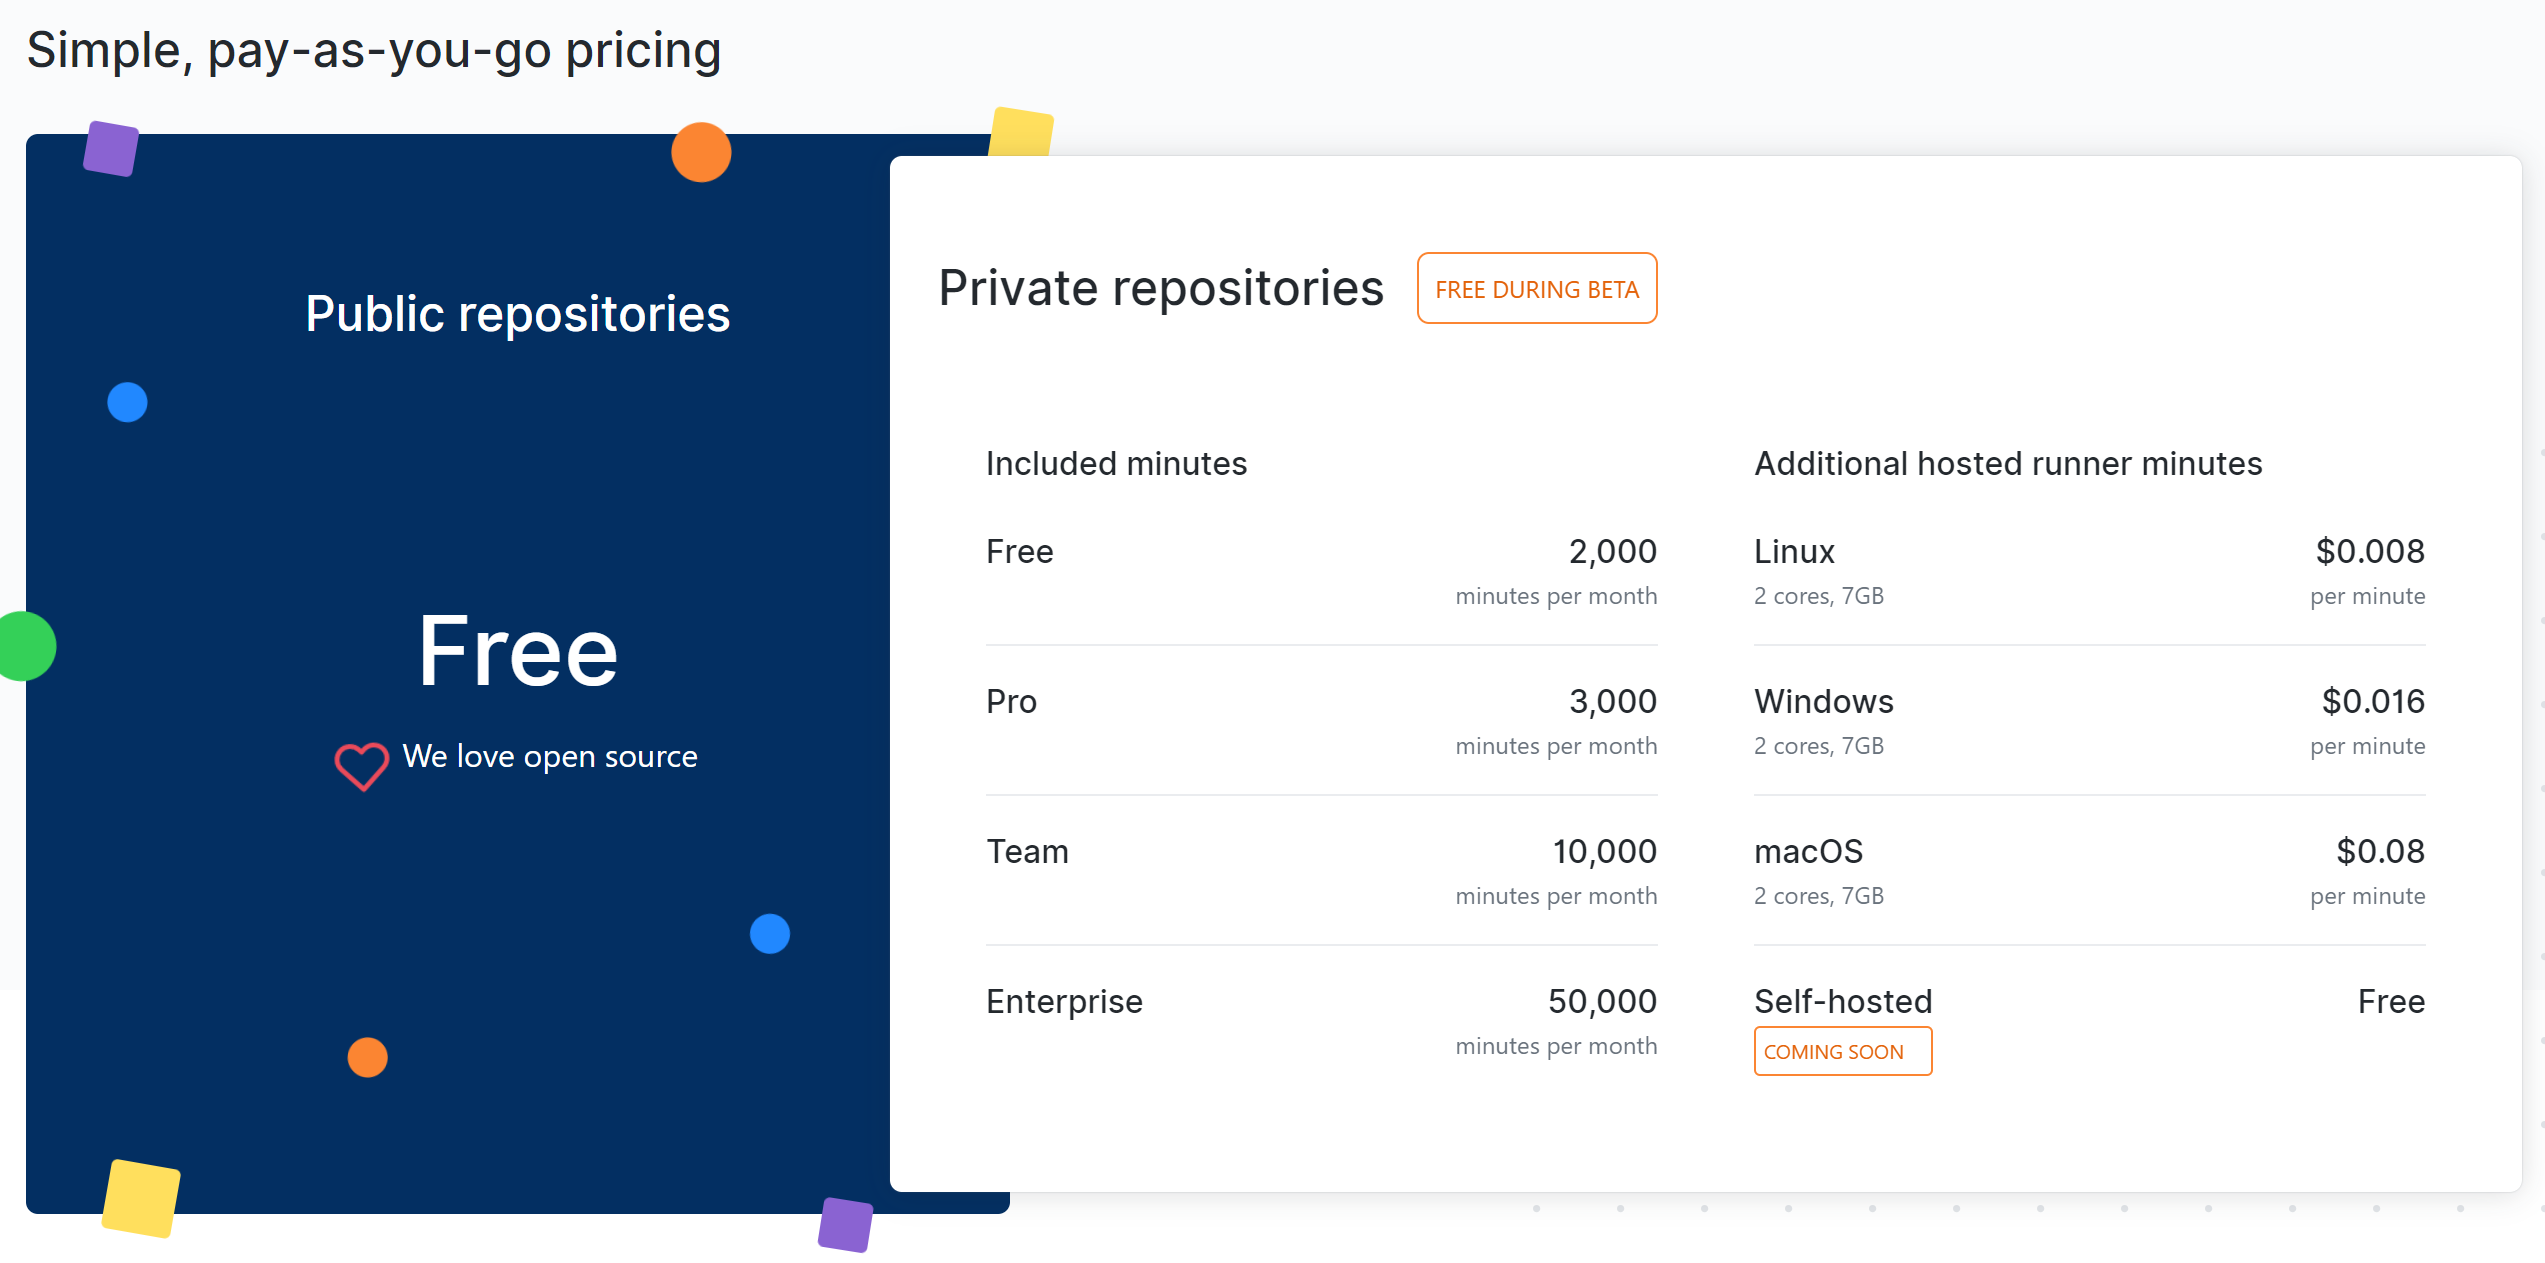
For public repositories it’s free! No limit on usage. Then for private repositories it starts free and then costs more as you need it.
Editing Your Action
The one thing about actions that wasn’t intuitive was how to edit one. I naturally went to the Action tab and was looking for some edit button.
Action yml files are stored in your repo at .github/workflows/ folder. You’ll need to navigate to that folder, select the action you want, then you’ll be able to edit your action.
Action Badge
The last thing worth mentioning is how to get a badge to display in your project’s README.
As documented here, you just need to add the following link into your project.
https://github.com/<OWNER>/<REPOSITORY>/workflows/<WORKFLOW_NAME>/badge.svg
Formatting it as a link, mine ended up being:

Now everyone visiting your project will be able to see your project’s latest build status.
Closing Thoughts
I was really impressed with Github Actions. As someone who has created builds in the past for other pipelines, an action was easy to setup and the editor was very informative.
I especially love the price for open source projects, free! If you are currently paying for a CI pipeline or don’t have one for your open source project I definitely recommend trying it out!