Exploring the Elmish Todo App

A little while ago I wrote an article entitled Getting Started with Elmish. It was me getting my feet wet with the language. Today I wanted to continue learning Elmish and decided to walk through the the Elmish Todo App.
If you’re new to Elmish, Elm or the MVU architecture, I recommend you read my Getting Started With Elmish article before this one. It describes the major parts of the MVU architecture, so I won’t be repeating that information here.
Running Locally
I performed the following steps to run this app locally:
- Clone the git repo
- Install yarn (not on the official install list, took me a minute to figure it out)
- Run
./build.cmd Watch(since I’m using Powershell) to launch the application
The app is now available at http://localhost:8080/, I can now create and manage my todos. As you can tell, I still have to write this blog post.
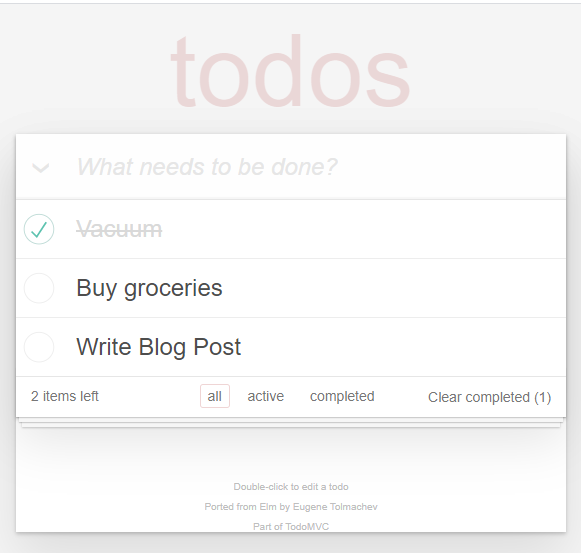
The basic functionality of this app is:
- Add todos
- Manage your list of todos
- Filter todos (all | active | completed)
- Edit a todo by double clicking on it
- Then clearing any completed todos.
After playing around with it, lets take a stroll through the code base.
Code Overview
Models and Init
Lets start by looking through our model and init function.
The Entry type describes a todo item. It has a description, completed, editing, and id property. Pretty simple modeling.
Then our Model type holds all data necessary for our application. Which consists of the following properties:
- entries – A list of entries
- field – contains the text currently in the input field
- uid – used to track the next entry id.
- visibility – determines which todos to show (all | active | completed)
Next we have our emptyModel, which is the initial state of our app. No entries, all todos are visible, nothing is typed into our input yet, and starting our ids at 0.
Then two functions, one for creating a new entry and our init function. If there something saved in the browser’s local storage it will render that Model, otherwise is will render the emptyModel.
Messages and Update
Then next lets talk about our messages and update method. Remember that every action in Elmish (and MVU paradigm) needs to be represented by a message.
The todo app defines 10 unique message type.
These messages are triggered at different points in our application lifecycle.
For instance, the Add message is triggered whenever the user enters a new “todo”. We quickly find the viewInput function defines the input field.
Line 8 defines what happens when the user presses enter, the Add message is emitted and is picked up by Elmish, which calls the update method with our msg.
Here is the first two cases of our update method.
On line 7, you’ll see what gets run whenever an Add message is sent to our update method.
It first checks to see whether we have any input, if we do add it to the model.entries, if we don’t just output the same model.entries. Then we emit a new model. We increment the uid, set the field to the empty string, and set the new list of entries.
The { model with ...} is shorthand for, give me the same model but only change the fields that specified in the .... This is necessary because F# types are immutable by default.
Here are a couple other examples of its usage.
The other case I wanted to point out is the UpdateEntry case.
This helps demonstrates how to succinctly perform operations on lists in F#. We have a list of tasks, have edited one of the tasks and need to update the correct one.
We define an updateEntry function which does that when the id matches. Then leverage the List.map function to apply the updateEntry function to every item in entries.
After mapping, whichever id the new description was for will be updated correct. Notice it uses the { t with ... } syntax as mentioned earlier.
Views
Almost at the end, lets look at our views. F# requires you to define functions before usage, so the highest level view is at the bottom of the file.
This is the top level div element on our page. We can express all our html elements in the <element> [] [] syntax. Here are a couple examples of how they are transformed into html elements viewable in the browser.
This allows us to express our html in F#, leveraging the compiler to help us check our html.
Getting back to our top level view.
This gets rendered in the browser in this html.
Which is pretty simple. The lazyView2 and lazyView3 are helper functions that help reduce the amount of re-renders that our app has to perform, therefore giving us better performance.
Lets also take a look at the viewEntry function.
It takes in a single todo item and a dispatch (which seems to be how messages get added to the Elmish “runtime”, based on this documentation.)
On line 3 there’s some logic to control the classname, which controls if an entry is “completed” or “editing”.
Then we can potentially trigger 6 different types of messages.
Line 10 – triggers a Check message – alternates whether the todo item is completed or not.
Line 12 – triggers an EditingEntry message – turns the entry into edit mode
Line 16 – triggers a Delete message – deletes the todo.
Line 24 – triggers an UpdateEntry message – updating the input after every keystroke.
Line 25 – triggers an EditingEntry message – turns the entry back into regular mode.
Line 26 – triggers an EditingEntry mesage – turns the entry back into regular mode.
Closing Thoughts
That about wraps it up for me and this simple elmish app walkthrough. This has definitely helped me learn more about Elmish, I hope it can help you as well.
I’m wanting to begin writing my own Elmish apps so I hope to do more of these in the future.