Add Swagger to a .NET Core 3.0 API
 If you’ve ever interacted with an API, you know that it can be messy. Does it support json or xml? How should I contruct objects to send to it? What HTTP request methods are supported? Is their any documentation? Is that documentation still relevant?
I’ve personally had to deal with all of these questions/problems in the past. As someone who writes APIs, I want to provide a better experience for anyone interacting with an API that I’ve written.
That’s where Swagger comes in. Swagger is a great tool for documenting and interacting with APIs. When Swagger is installed in your application, Swagger automatically discovers endpoints, objects and request methods of your application.
Lets see how easy it can be to install Swagger to a .NET Core API project to provide quality documentation.
API Project
Lets create a new API project. Here are the commands using the dotnet cli to create a solution file, an API project, add the API reference to the solution file and then run your API:
> dotnet new sln -n SwaggerTutorial
> mkdir SwaggerApi
> cd .\SwaggerApi\
> dotnet new webapi
> cd ..
> dotnet sln .\SwaggerTutorial.sln add .\SwaggerApi\SwaggerApi.csproj
> dotnet build</strong>
> dotnet run --project .\SwaggerApi\
You can also create this via Visual Studio’s menu dropdowns as well.
When this app is run through the command line, you should be able to navigate to https://localhost:5001/weatherforecast and view a list of weather forecasts similar to the following.
If I was tasked with integrating with this API I would immediately have questions.
- Are there any other endpoints?
- Are there any optional types excluded from this json payload?
- What kind of object will I get back in case of an error?
Swagger exists to help answer those questions.
Startup.cs
The Startup.cs is the configuration center for a dotnet core application. Here’s the file that was generated for us when we created our API project.
You’ll notice a lot of basic setup is shown here, with methods names that make it fairly obvious what they do, but two things are worth calling out.
- AddControllers() – since this is an API project we only need Controllers.
- If you were creating an MVC app, the method would be AddMvc()
- Then the snippet about UseEndpoints() and MapControllers() is new to 3.0.
- More information can be found on the Microsoft doc recommending steps to upgrade a 2.2 app to 3.0.
Adding Swagger/Swashbuckle
Lets setup Swagger. We need to add the Swashbuckle nuget package to our project. Here is the cli command to run in the API project:
> dotnet add package Swashbuckle.AspNetCore --version 5.0.0-rc4
Most likely by the time you read this a newer version of Swashbuckle.AspNetCore nuget package will have been released. You can check the most current version here, I would recommend using a later version if available.
Then modify the Startup.cs project by adding the three Swagger methods.
Then launch your application, navigating to /swagger of whatever your base API is. Mine is https://localhost:5001/swagger/. You’ll see the following: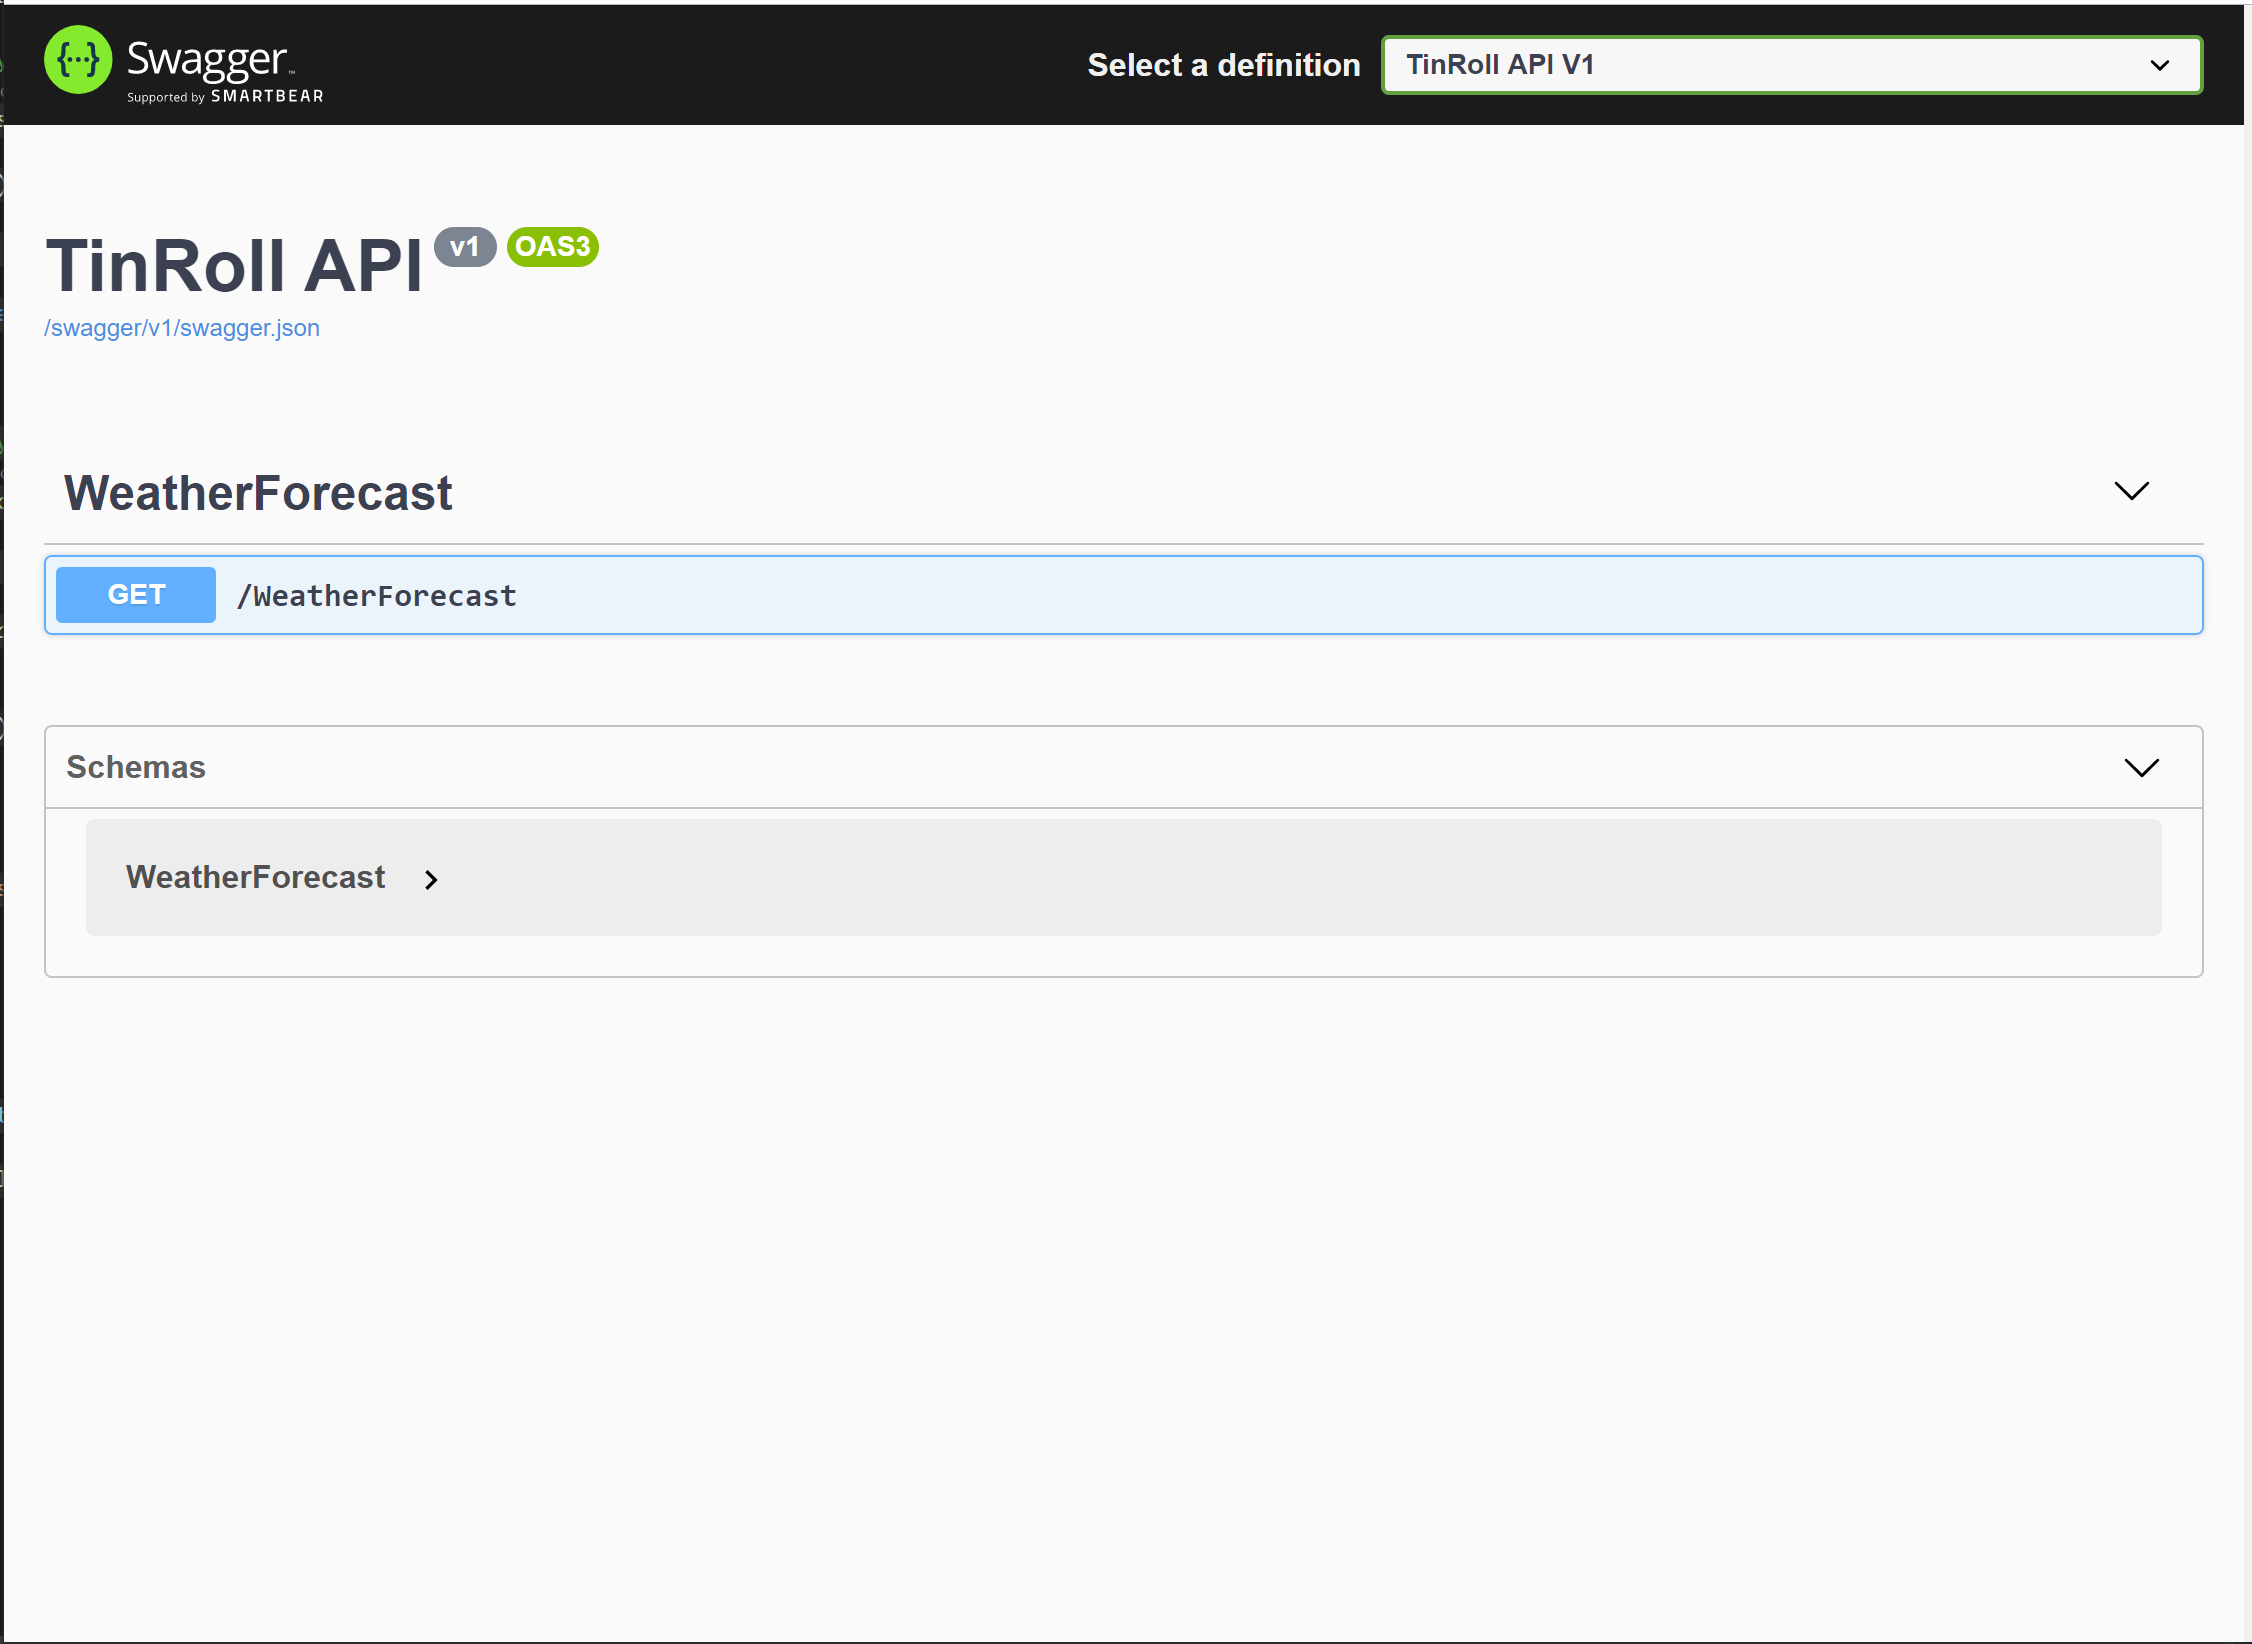
This Swagger UI now describes our API. At the moment we only have one controller (WeatherForcast), with one endpoint (/WeatherForecast) and one request method (GET).
But there’s also a section called schemas which describes the objects of your API.
Swagger automatically generates json versions of C# objects. Now we don’t need to rely on the guessing the types based on the json output.
Try it Out
Not only does Swagger describe your API endpoints, it also allows you to interact with it.
If you expand WeatherForecast, you can click the “Try it Out” button, then click the long blue “Execute” button.
You’re now able to interact with your API through Swagger. AWESOME!!!!
I’ve used this to interact with apis that didn’t have a UI, the UI wasn’t built yet, or when I was testing to determine whether an issue I was seeing was UI or API related. It’s a handy tool.
Adding ZipCode Controller
One of the great things about Swagger is that it’s self documenting. Any changes to the API project automatically get added to this Swagger UI.
Lets add a new controller. I’m using Visual Studio which provides the ability to automatically generate the following Controller.
If we restart our app and navigate to our Swagger page we’ll see five new ApI endpoints show up. 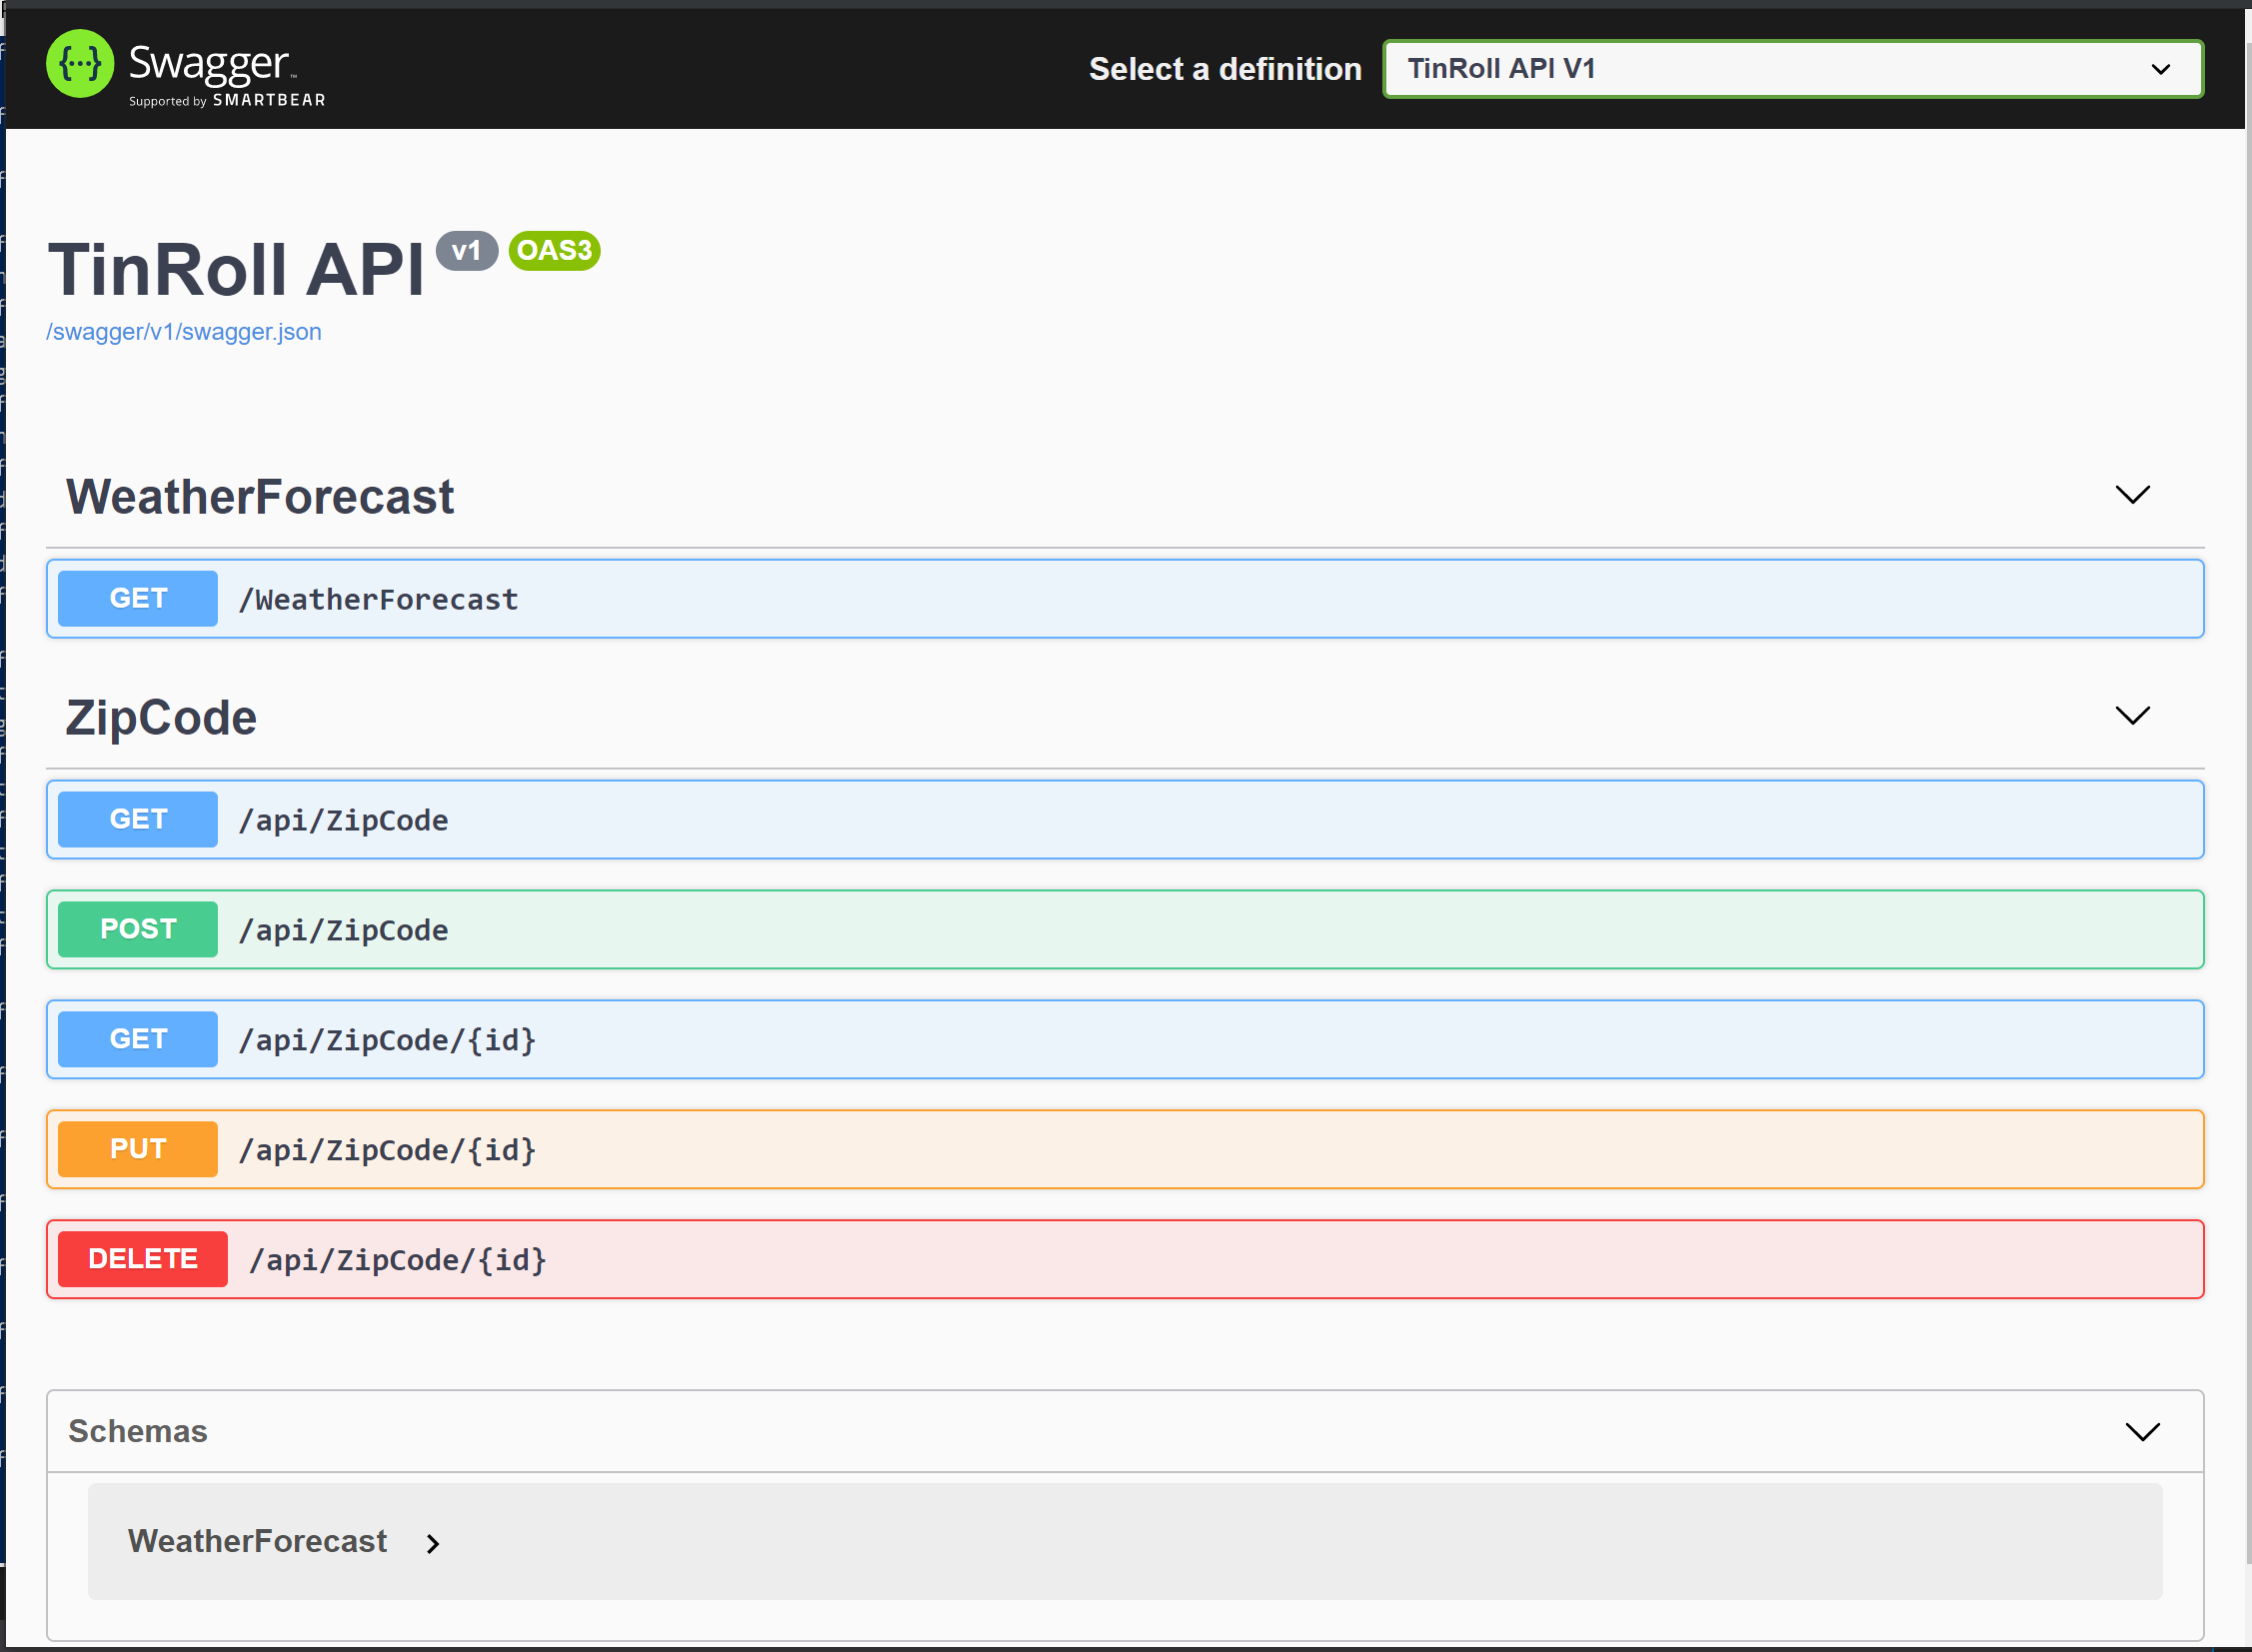
Swagger automatically detected our changes and reflected them in the SwaggerUI. As long as someone integrating with your API can access the SwaggerUI, they will always have the latest information about how to integrate with your API!
Swagger Url Configuration
You can control what route the SwaggerUI will render in your API by using the RoutePrefix option in your Startup.cs.
If you use the empty string, the SwaggerUI will show up on the base of your site, https://localhost:5001/.
Or you could specify any value there you wanted, https://localhost:5001/uselesslongpathtodemoconfigsetting.
You have full control over where the SwaggerUI generates.
Specifying HTTP Response Codes
Another useful piece of information* that Swagger will generate for you, is which HTTP Status codes and objects might be returned from a controller endpoint.
Lets create an object to hold any error messages returned from our system.
Then I can decorate a controller method with the following attributes:
Then when navigating to the SwaggerUI this information is displayed on that endpoint.
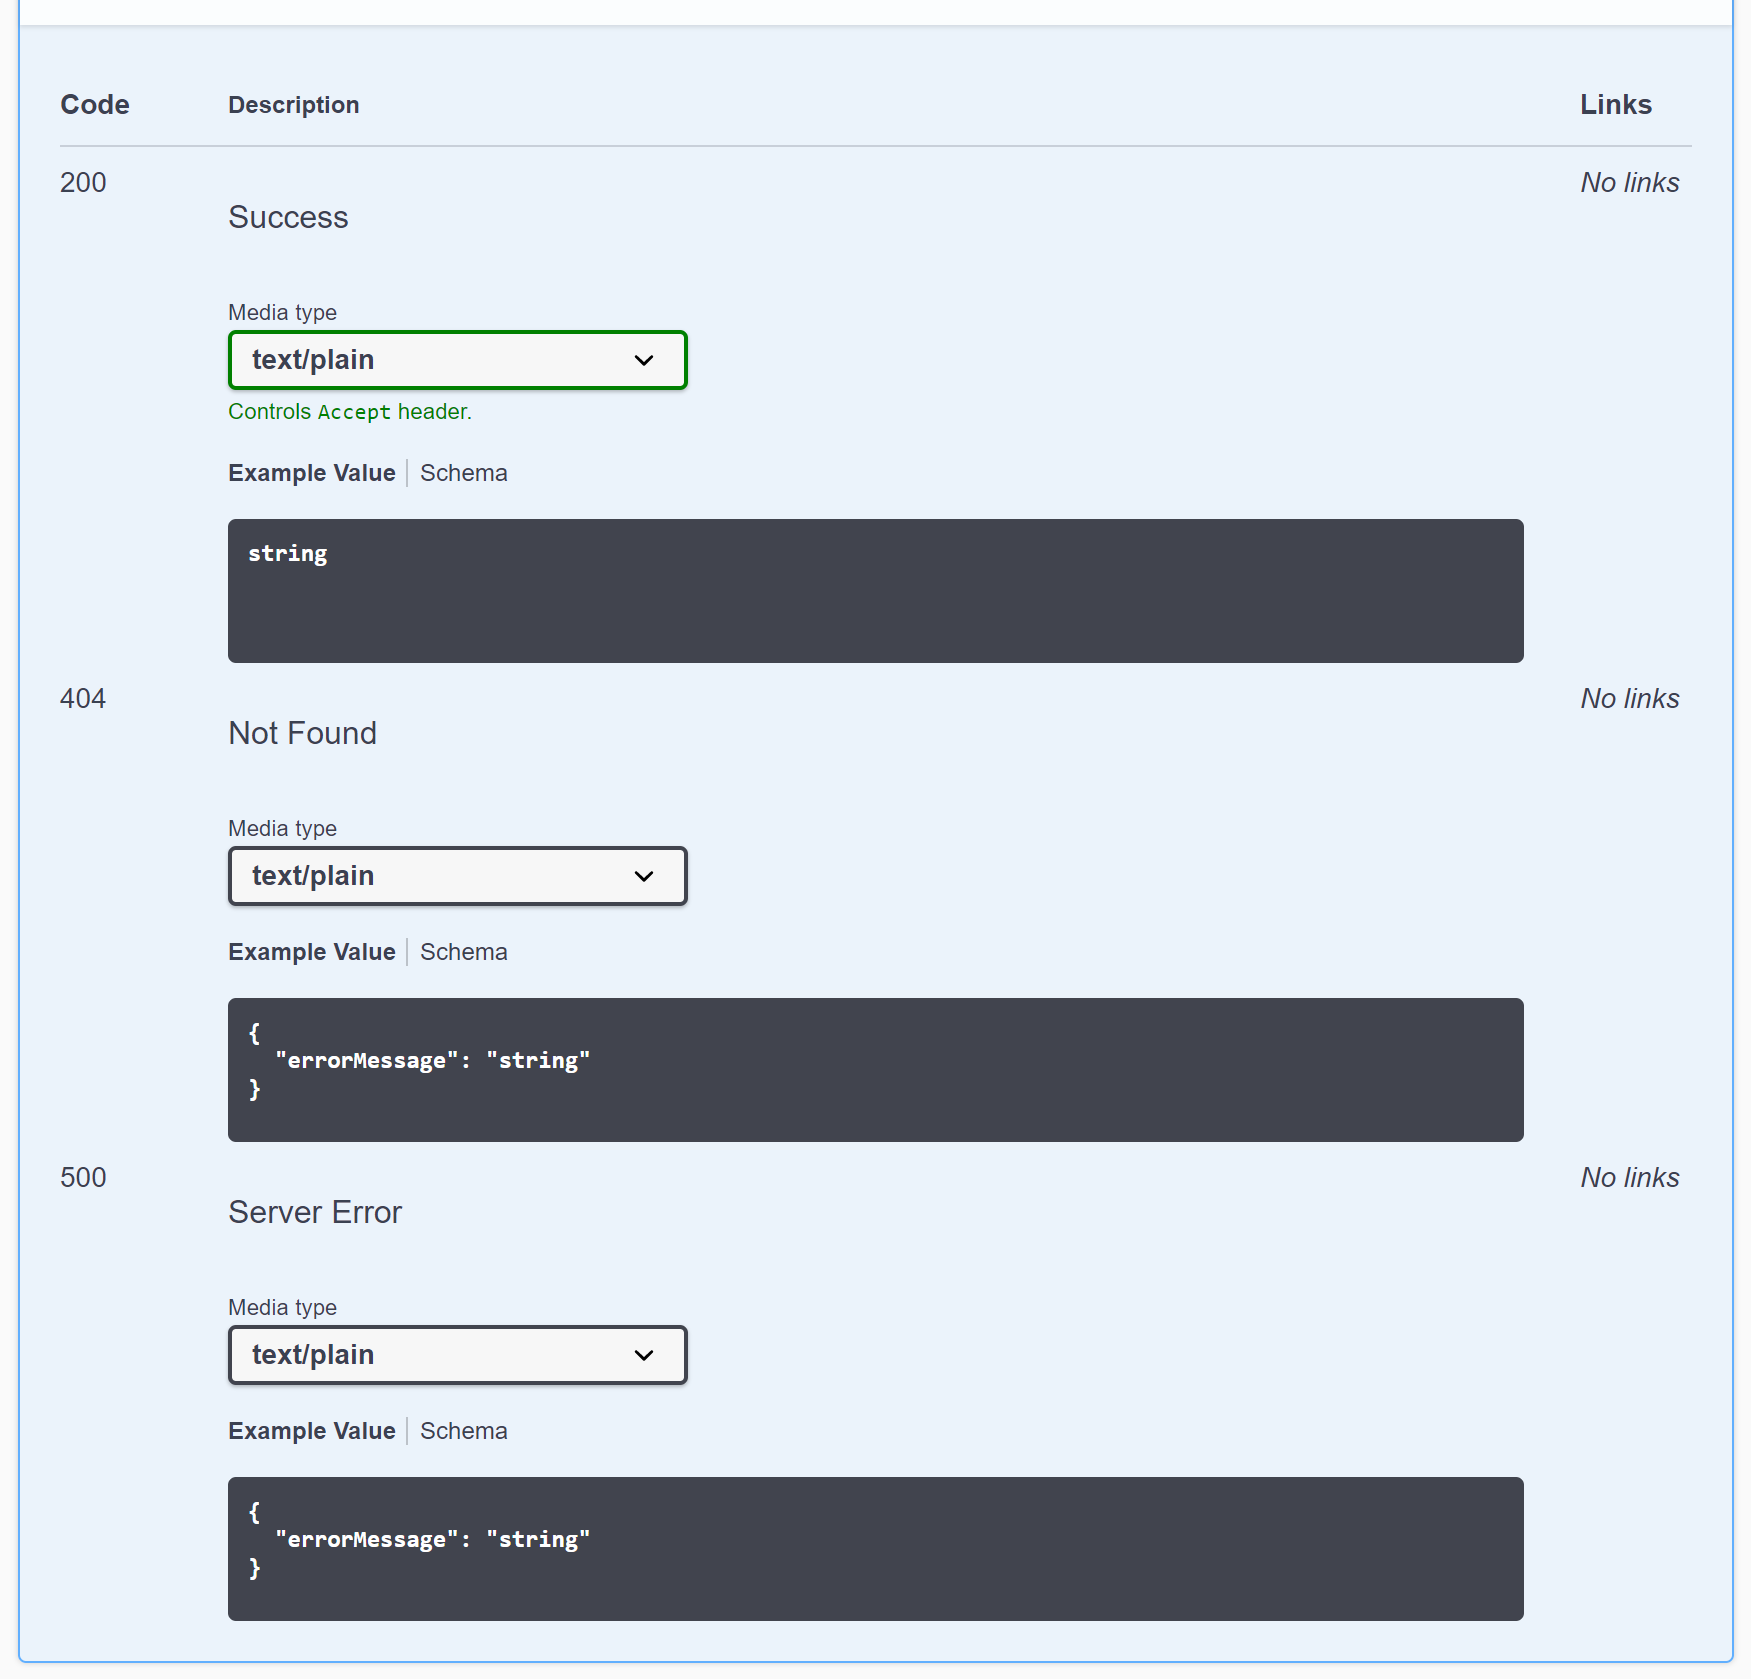
This helps anyone integrating with your API know what error codes they should catch on their end and what type of objects will be returned.
Closing Thoughts
Swagger makes it easy to automatically provide fairly complete information about an API endpoint. Having this information present and available helps make everyone’s life better.
I’ve presented just a basic overview of Swagger, I would recommend reading more about it in order to unlock how useful it can be.
Thanks for the read, if you have any questions feel free to comment of contact me via my LinkedIn account.
*Thanks to Robert Taylor for pointing that out.